Managing Fulfillment Options
When
Note: To modify an order, click the Edit button in Order to apply changes.
About the fulfillment tab
The order fulfillment tab is composed of four sections:
| 1. | Fulfillment location: where an order originates. |
| 2. | Destination parameters: customer IDs, where orders are shipped to. |
| 3. | Shipping parameters: shipping service type, timing of shipment, costs associated with shipping. |
| 4. | Current fulfillment status: the current status of the shipment. |
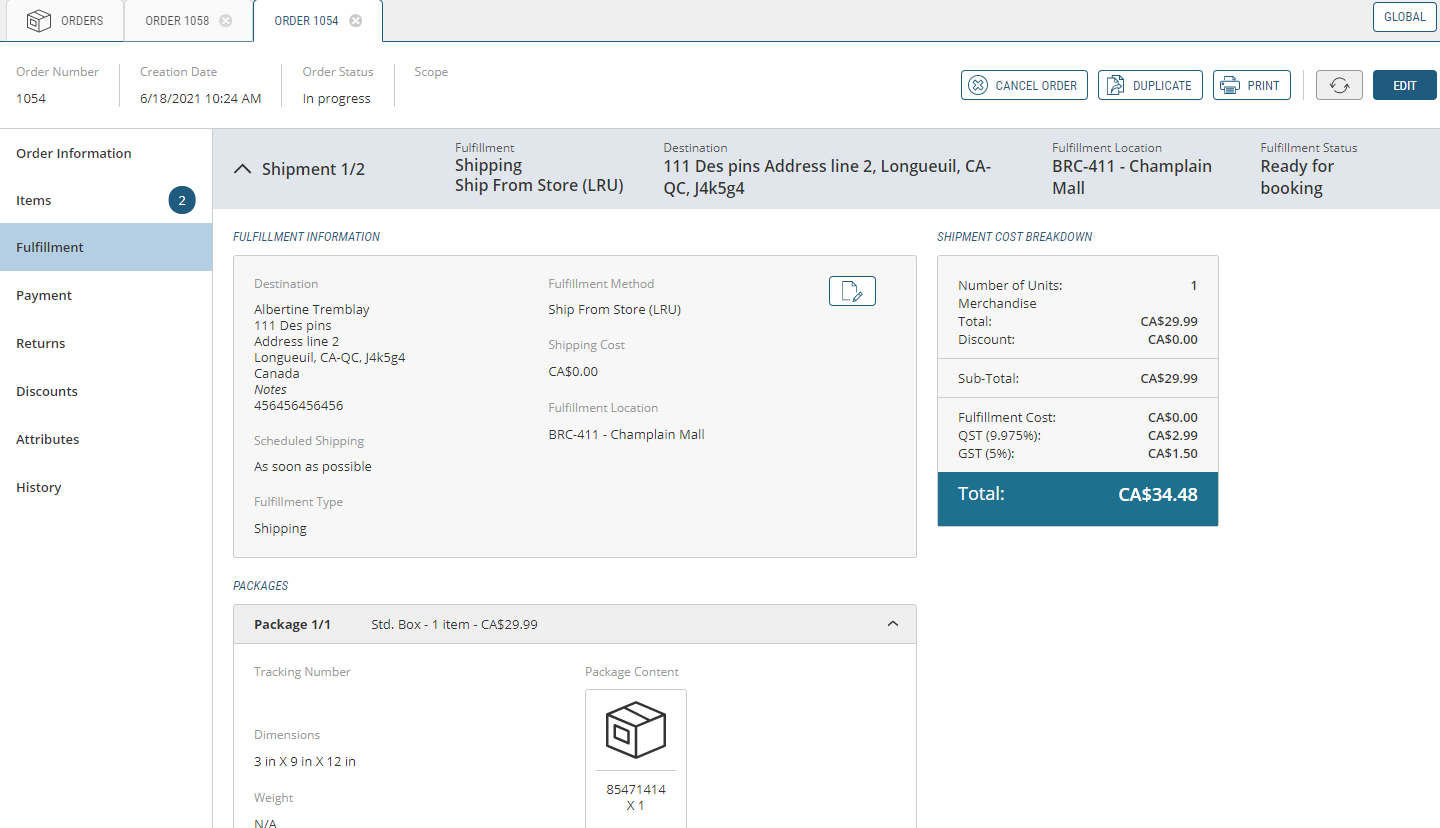
Figure 1 - Managing Fulfillment Options, Fulfillment tab
You will also find valuable fulfillment information in the shipment header:
| 1. | Number of shipments in this order: the number of shipments in the order. |
| 2. | Fulfillment: method that the order will arrive at destination (shipping, delivery or pickup). |
| 3. | Destination: final shipment destination address. |
| 4. | Fulfillment Location: where the order fulfillment takes place. |
| 5. | Fulfillment Status: current point in the workflow of the fulfillment process. |

Shipment fulfillment is separated into various stages that are based on the shipping method selected by the customer:
| • | A customer may want to have purchases shipped directly to their home. |
| • | Processing an In-Store Pickup is required if the customer wishes to pick up their purchases at the location and items are in stock. |
| • | Receiving an In-Store Pickup is required if the customer wishes to pick up their purchases at the location, but items must be transferred from another |
You can add and revise Fulfillment variables in the Fulfillment Information box.
changing destination
Shipping addresses may need to be revised for a variety of reasons, example: the customer has moved, or prefers to have an order shipped to their chalet during a certain portion of the year.
| 1. | Click Change Destination to revise shipping or delivery address. |
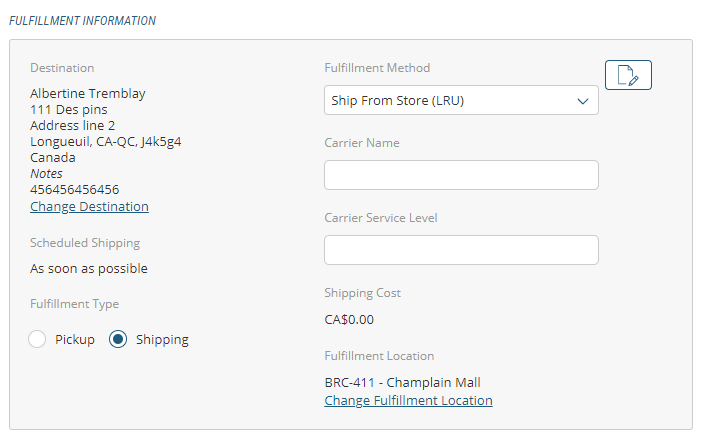
Figure 2 - Managing Fulfillment Options, Fulfillment Information box
This will bring up the Change Destination dialog box.
| 2. | Previously recorded customer addresses will be displayed. Click the appropriate address. |
| 3. | Click Apply Changes. |
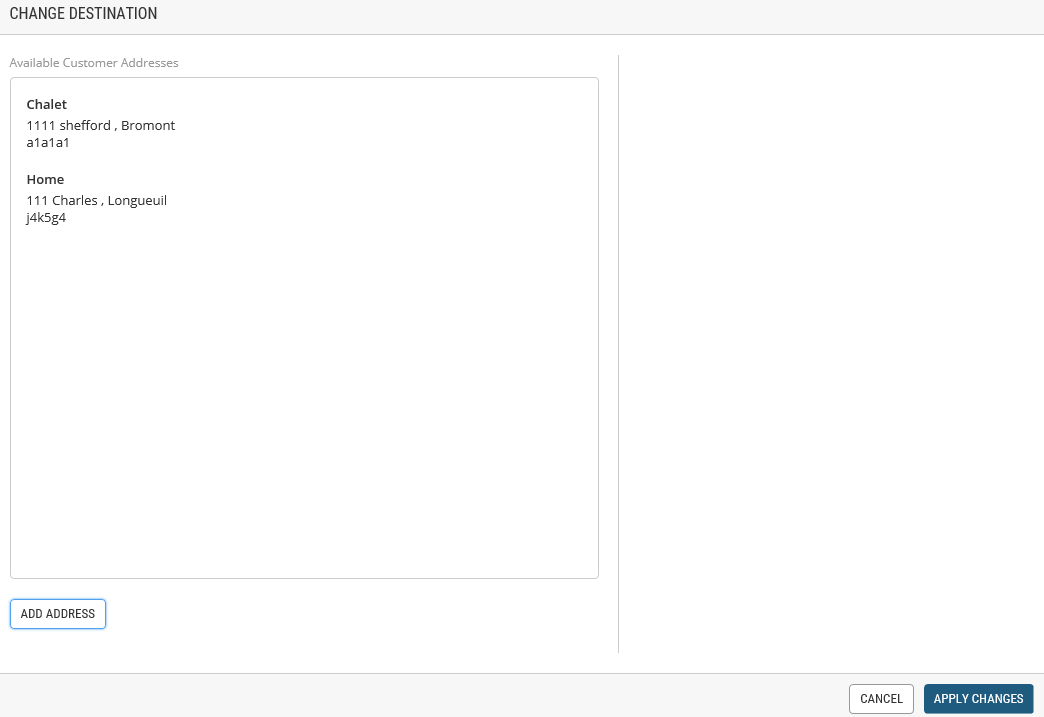
Figure 3 - Managing Fulfillment Options, Change Destination box
Adding a new address
If you need to enter a new address:
| 1. | Click Add Address to enter a new address. This will bring up the Add Address dialog box. |
| 2. | Enter the mandatory fields and click Apply Changes. Mandatory fields are indicated with a red asterisk * . |
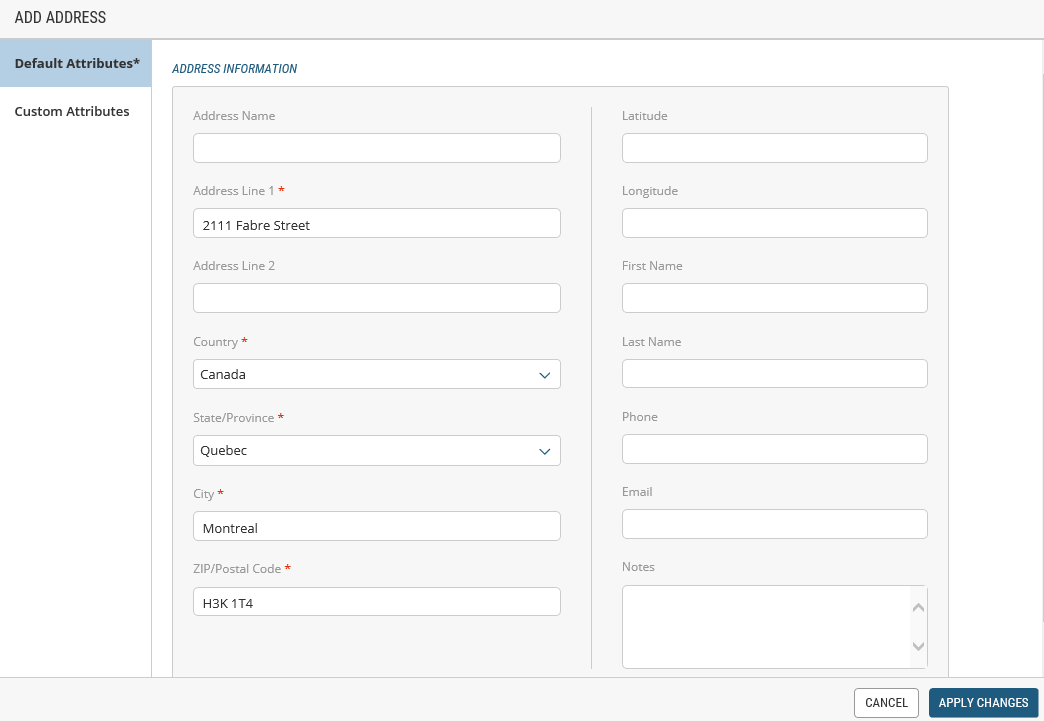
Figure 4 - Managing Fulfillment Options, Add Address box
managing schedules
When using Pickup or Delivery fulfillment methods, you can select a defined timeslot as per the customer's request.
Important for shipping fulfillment only: Timeslot selection does not apply when a shipment is shipped using a carrier. In this case, Scheduled Shipping always appears as As soon as possible. When fulfillment type is Shipping LRU (Least Recently Used) or Shipping Competition, the Fulfillment Location is set to Assign automatically since the system is picking the fulfillment location as per specific system configurations.
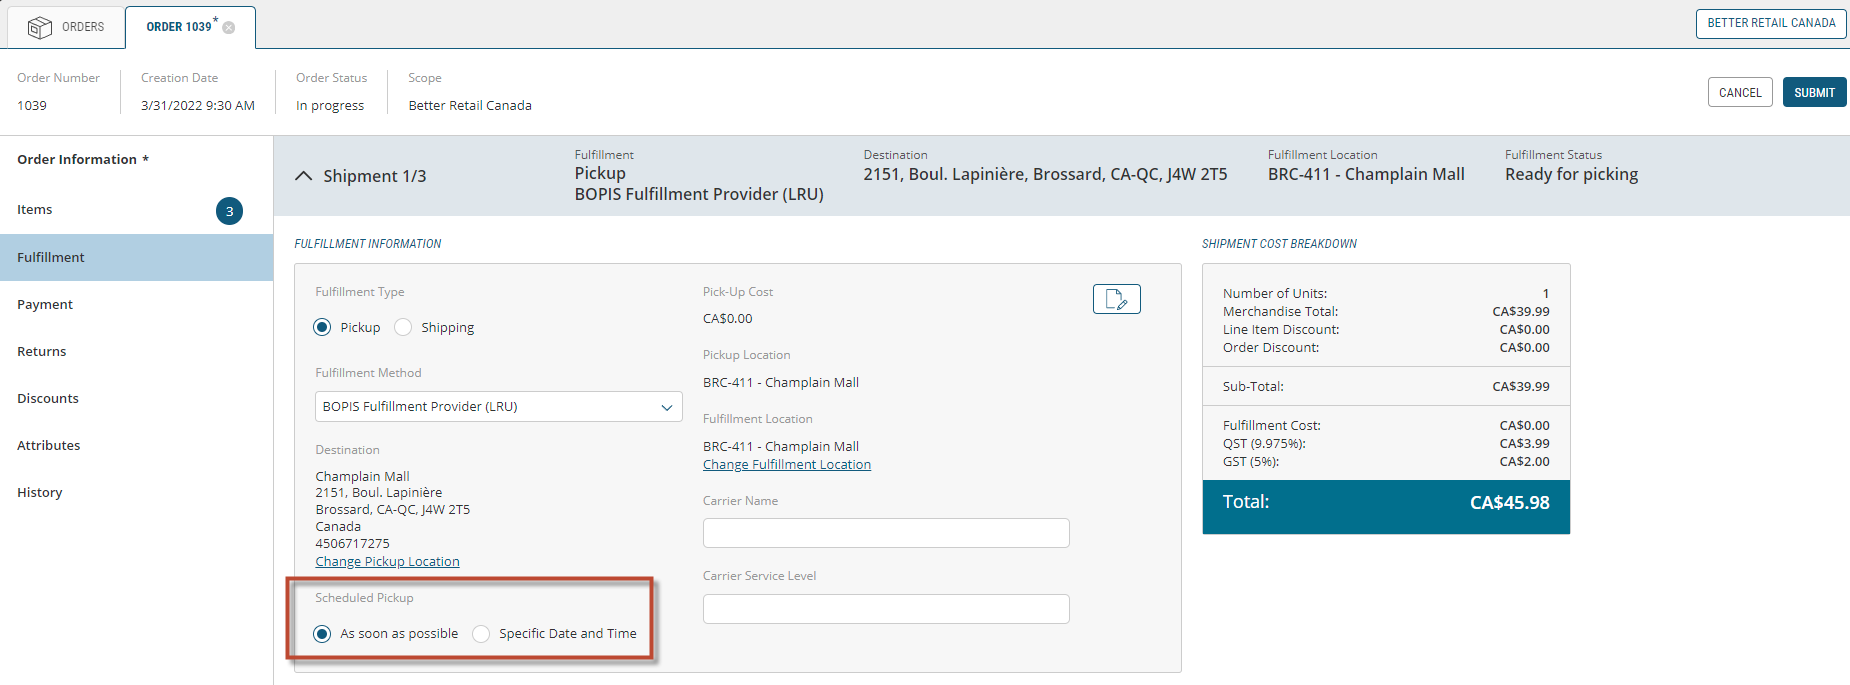
Figure 5 - Managing Fulfillment Options, Fulfillment Information box
managing a pickup schedule
A customer can choose to pick up an order as soon as possible or during a prescribed time and date.
Important: If your business model does not offer a pickup in store option, the options will not appear in your platform configuration.
| 1. | Click As soon as possible or, |
| 2. | Click Specific Date and Time. |
| 3. | Click Change Schedule to bring up scheduling options. |
| 4. | Use the timeslot picker to choose a specific date and time for pick-up. |
The timeslot picker is only displayed when an Administrator has set up the pickup and delivery hours for the location. You can manage pickup schedules with a grid that allows you to select times when the services are available.
| 5. | Select and click Available timeslot (they will appear in dark blue). Once selected, timeslots appear in green. |
| 6. | Click Apply Changes. |

Figure 6 - Managing Fulfillment Options, Manage Timeslots grid
managing a Delivery schedule
Important: If your business model does not offer delivery from a store, these options will not appear in your platform configuration.
| 1. | Click As soon as possible or, |
| 2. | Click Specific Date and Time. |
| 3. | Click Change Schedule to bring up scheduling options. |
| 4. | Use the timeslot picker to choose a specific date and time for pick-up or delivery. |
The timeslot picker is only displayed when an Administrator has set up the pickup and delivery hours for the location. You can manage delivery schedules with a grid that allows you to select times when the services are available. You can select a delivery time slot without disrupting workflow.
| 5. | Select and click Available timeslot (they will appear in dark blue). Once selected, timeslots appear in green. |
| 6. | Click Apply Changes. |
Figure 7 - Managing Fulfillment Options, Manage Timeslots grid
Selecting a fulfillment location
When creating an order, you can select a fulfillment location from where the shipment will originate. You may also have to modify the fulfillment location based on customer requests or for fulfillment reasons.
The fulfillment type is already selected when an order is created or modified. Changing this setting will reset the entire window and you may have to assign a new destination and update the Fulfillment Method and Carrier Name section if needed. When changing these settings, shipping costs may also be added, depending on the option selected.
Note: These changes are possible only if the shipment is not being processed by a store or the warehouse.
| 1. | If an order has to be shipped, click Shipping from the Fulfillment Method drop-down menu. |
Note: This only applies when Transmart European Carrier is configured in the platform. Enter Carrier Name and Carrier Service Level .
| 2. | Click Change Fulfillment Location to bring up the dialog box. |
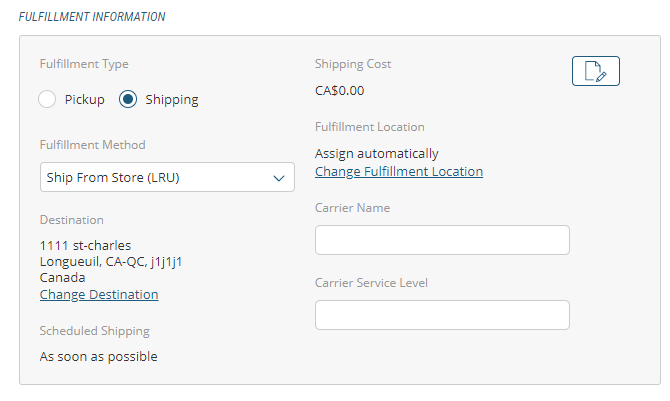
Figure 8 - Managing Fulfillment Options, Fulfillment Information dialog box
| 3. | Select a Location. |
| 4. | Click Apply Changes. |
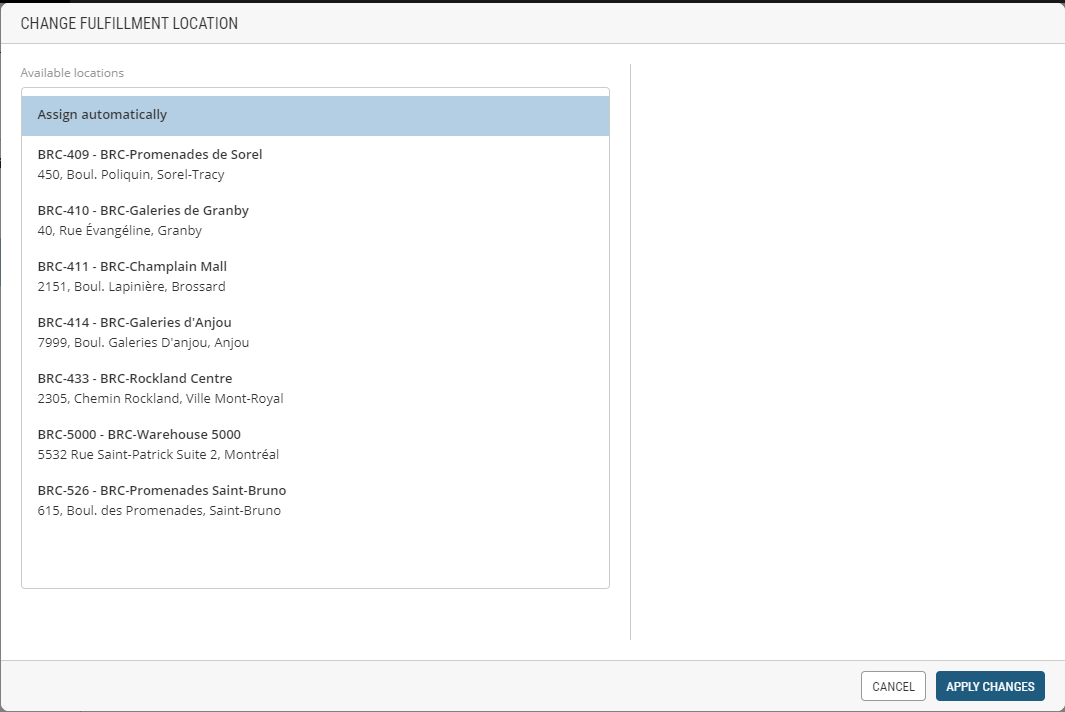
Figure 9 - Managing Fulfillment Options, Change Fulfillment Location box
Adding a note to a shipment
Shipment notes or instructions can be added. They are for internal use only.
| 1. | Click the Paper and Pencil icon to add shipment notes. |
| 2. | Add Notes. |
| 3. | Click Save. |
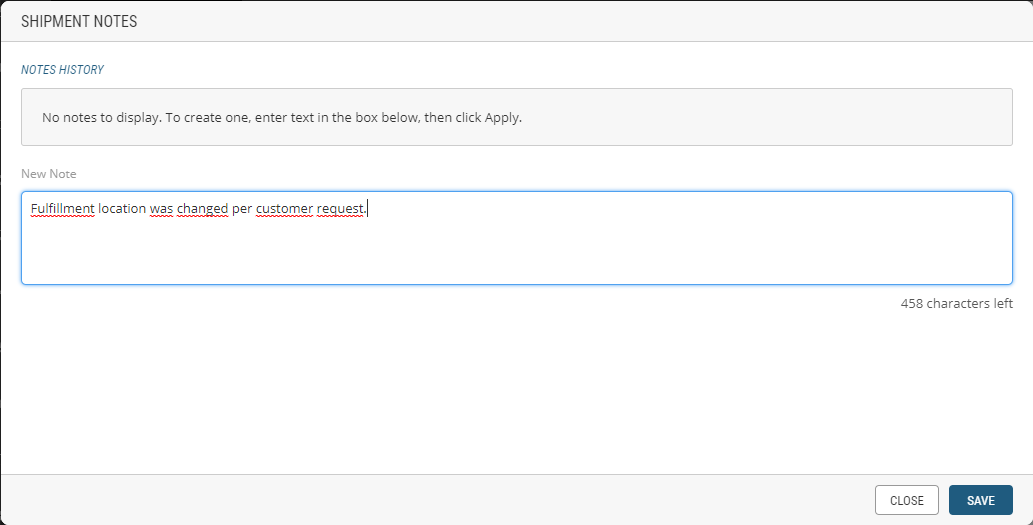
Figure 10 - Managing Fulfillment Options, Shipment Notes box
changing a PICKUP LOCATION
Customers may change their minds about where they want to pick up their orders. In these cases, pickup locations can be revised.
| 1. | Click Change Pickup Location. |
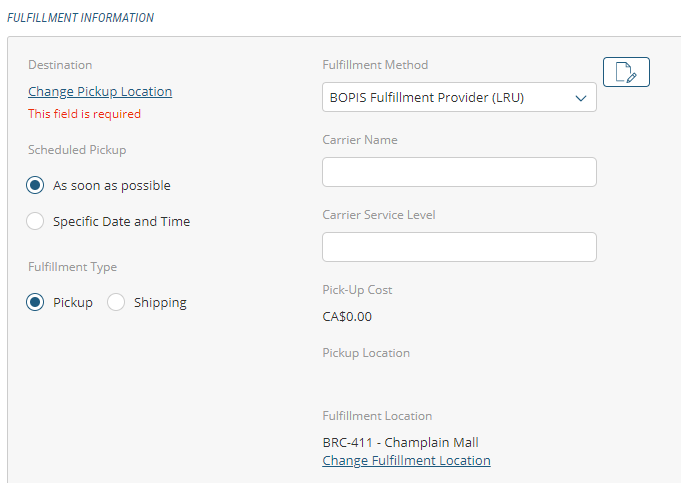
Figure 11 - Managing Fulfillment Options, Fulfillment Information box
| 2. | Select a Location from Available Locations. |
| 3. | Click Apply Changes. |
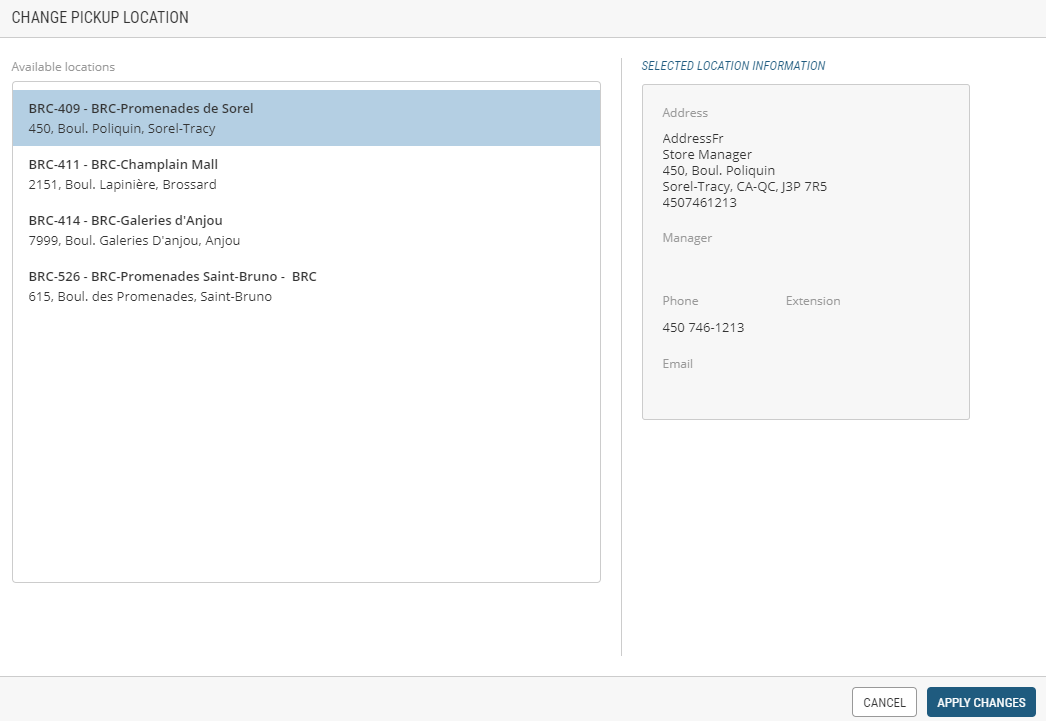
Figure 12 - Managing Fulfillment Options, Change Pickup Location box
CHANGE SCHEDULED Pickup
Customers may change their minds about when they want to pick up an order. In these cases, pickup times can be adjusted.
| 1. | Click Change Schedule. |
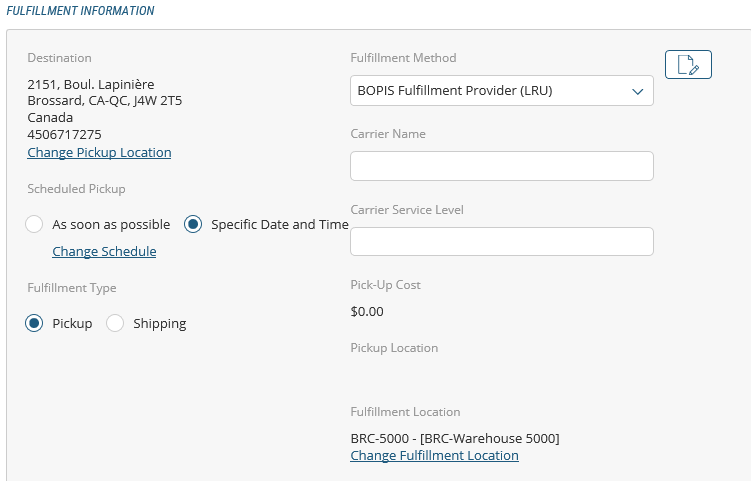
Figure 13 - Managing Fulfillment Options, Fulfillment Information box
| 2. | Click an Available Timeslot (shaded area) from the pickup calendar. |
| 3. | Click Apply Changes. |
REFERENCES
| • | Managing Locations |
| • | Adding Notes to Customer Orders |