Adding Roles to a User
You can add roles to users by using the Edit Security Roles lightbox in the User Details panel.
Adding a Role to a User:
| 1. | If needed, select a user in the list and double-click it. |
The Users Details panel opens.
| 2. | Select the Direct Roles tab. |
The tab displays the Orchestration Console roles currently associated with the user.
| 3. | Click the Edit icon |
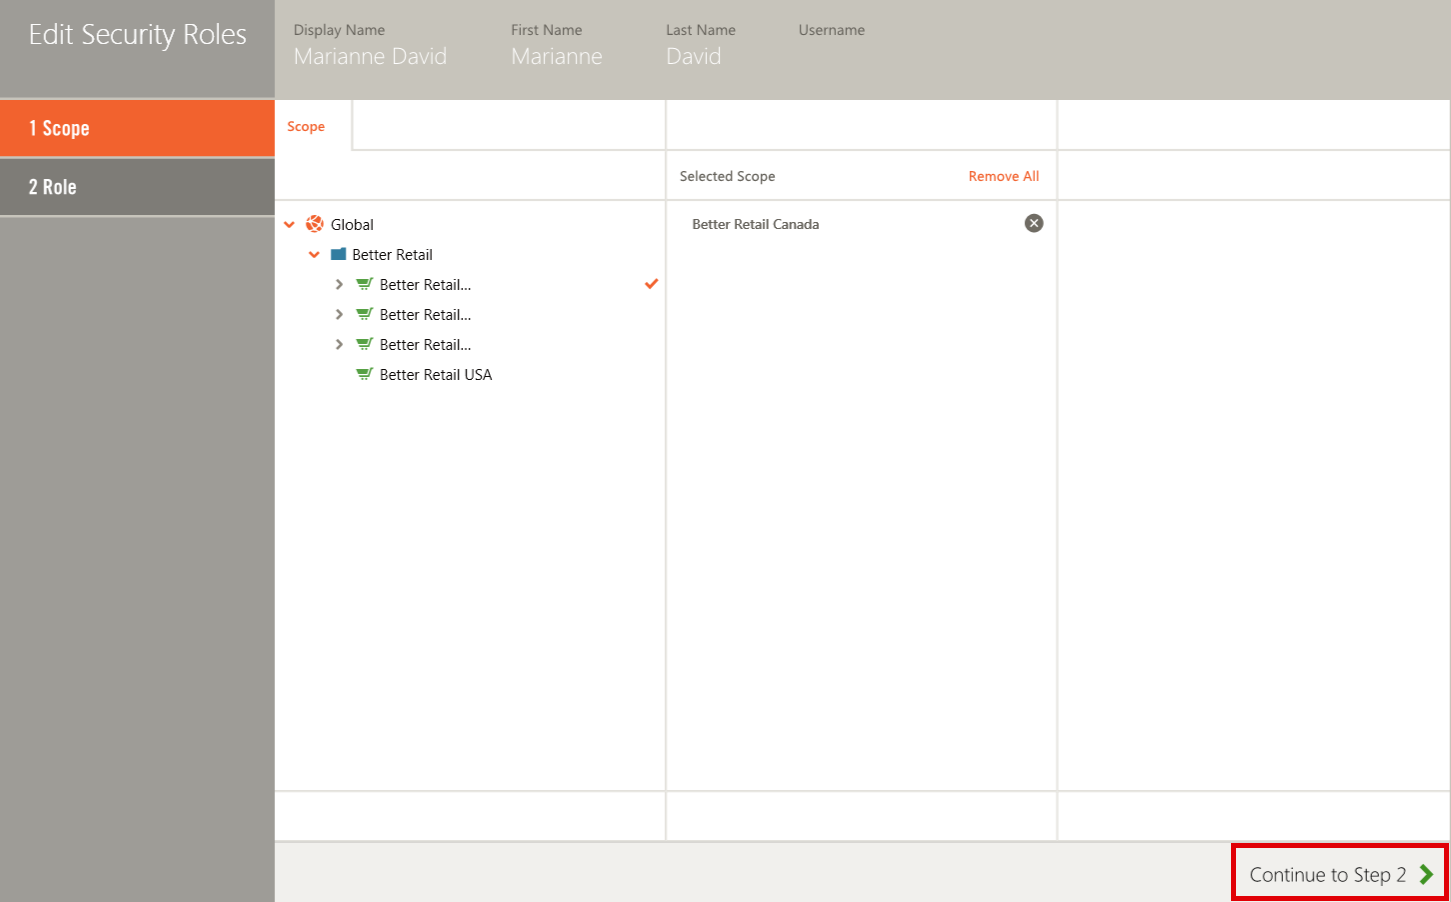
Use the Edit Security Roles lightbox to add roles.

| 4. | Navigate through the scope tree by clicking the Expand arrows to open child scopes. |
You can only select scopes for the roles that you are allowed to manage.
A role can only be associated with a Sales Scope or a Dependent Scope, not a Virtual scope. The ![]() Add icons that appears beside each scope as you navigate the tree will be grayed out for Virtual Scopes.
Add icons that appears beside each scope as you navigate the tree will be grayed out for Virtual Scopes.
When assigning roles to a group, you can select both system and custom roles.
| 5. | When you have found a scope that you want to select, click Add to the right of the scope name. |
The scope name appears in the Selected Scope list.
| 6. | Find and select all the scopes that you want to add. |
| 7. | Click Continue to Step 2 at the bottom right of the lightbox. |
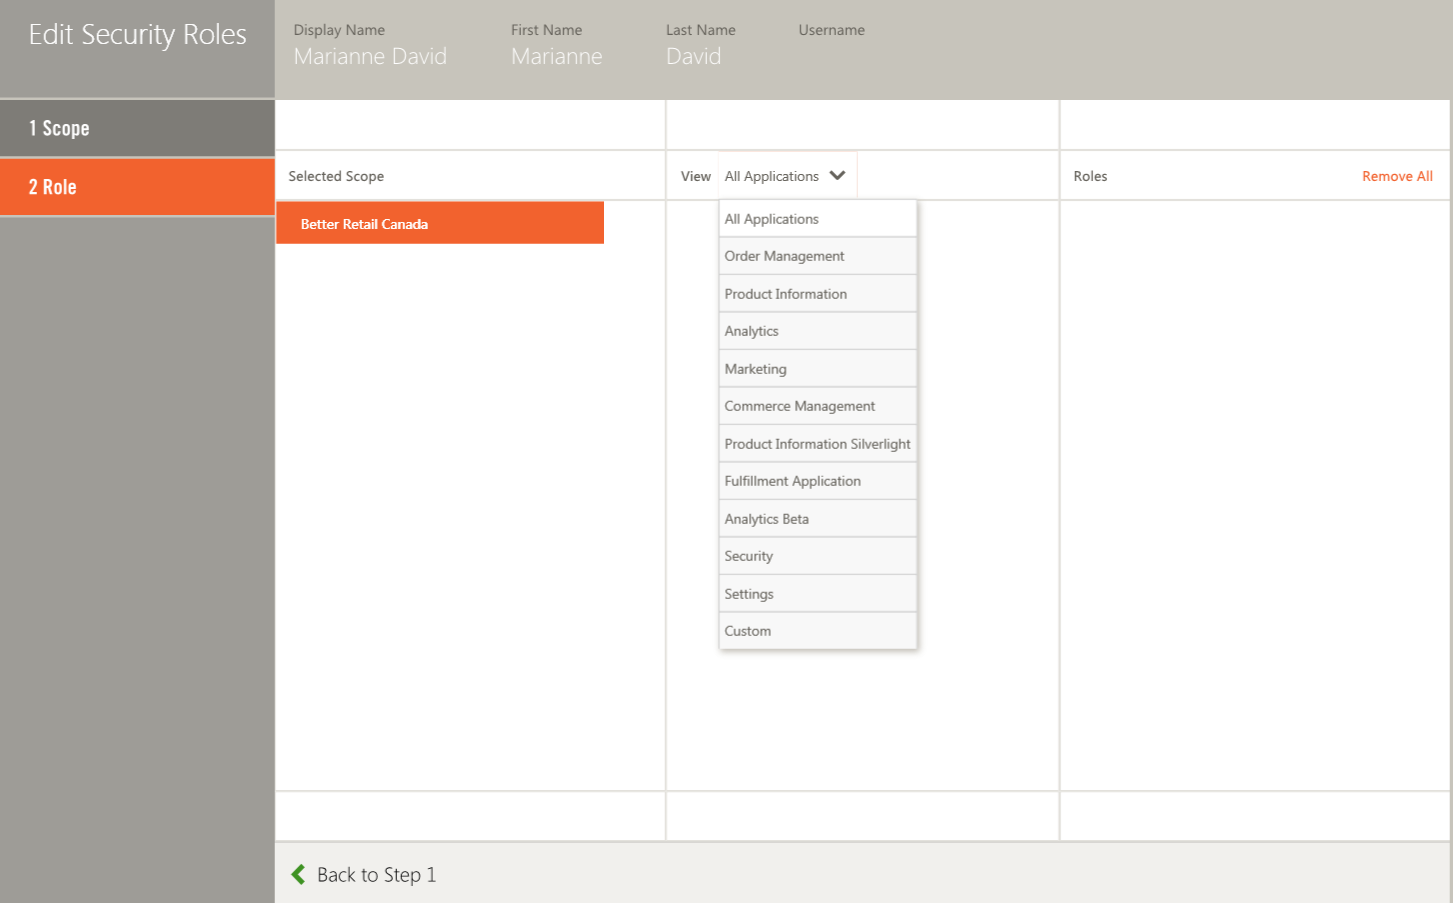
The Role tab opens.

Ensure that a Scope is selected in the Selected Scope column. Once selected, a list of eligible Roles for the selected Scope is displayed. By default, All Applications are displayed.
The second column displays all of the Roles per application.
| 8. | If needed select an application by clicking the Expand arrow to reveal the list. |
| 9. | Add a role by mousing over it and clicking the  Add sign next to the role. Add sign next to the role. |
Selected roles appear in the Roles list.
| 10. | Click OK. |
| 11. | Click the Save icon |
Once you have saved the changes, system-generated roles, also known as child roles, will appear in the Effective Roles tab for this user.
REFERENCES
| • | Creating Users |
| • | Enabling a User |