Managing Countries
sETTINGS > COUNTRIES AND REGIONS
In the Settings application, you can manage the list of supported countries and regions in the Orchestration Console. This includes the ability to view, modify and add to the list of countries and regions.
Accessing countries and regions from the settings application
In the Navigation panel, select Countries and Regions.
A listing of all the currently defined countries is displayed.
Note: Next to the search bar is an option titled "Hide unsupported countries" by enabling this, you can filter out countries that are irrelevant to you and make your list more manageable.
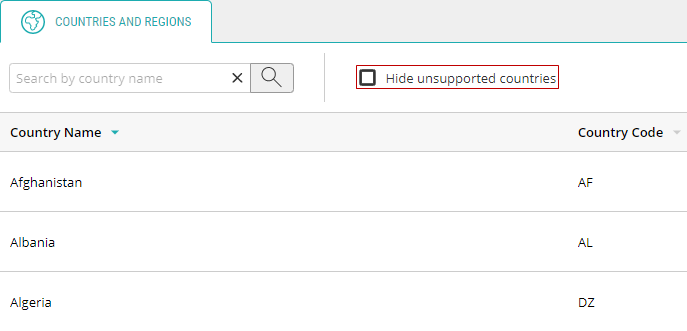
Figure 1 - The Hide unsupported countries button
Viewing Countries and Regions
To view a particular country from the Countries and Regions section click on its name in the list. Once you do this, you will be brought to a new tab within the application where you can see that country's settings and the regions it has. To view the regions and their information, select the Regions section found under the Country Settings and you'll be brought to the list of every region made for that particular country.
Adding Countries
Note: when you add a country, its corresponding regions will be available for selection once that country is selected. For example, if Canada is selected as the country anywhere on the platform, you will only be able to choose from its constituent provinces and territories.
|
1.
|
In the Countries and Regions section, click Add Country on the top-right. |
|
2.
|
Once this is done you will be brought to a New Country tab where you must input a two letter code for that country (ex. CA for Canada, US for United States). |
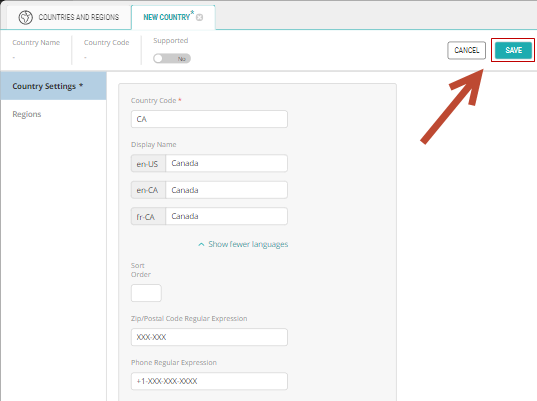
Figure 2 - Saving a New Country
Note: you also have options here to input the Display Name of that country in whatever languages you support, its Sort Order (where its displayed in the list regardless of its alphabetical order), the Zip/Postal Code Regular Expression of that country, its Phone Regular Expression, and lastly, at the top, you can toggle if that country is supported or not.
Tip: by using countries you're able to configure the regions to suit your specific operating permissions and restrictions. For example, if your company is only allowed to receive payments from within one particular country's borders and/or can only ship within a certain region you can mirror these restrictions on your platform.
Adding regions to a country
|
1.
|
In the Countries and Regions panel select the country you wish to add regions to and you will be brought to its tab. |
|
2.
|
From here, select the Regions section found under the Country Settings. |
|
3.
|
In this section, you can see the regions already available for this country. |
|
4.
|
To add more, click Add Region in the top-right corner of the Regions section. |
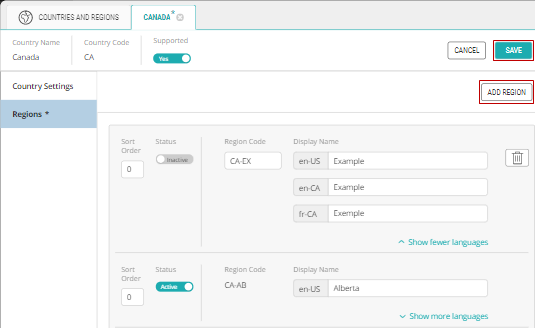
Figure 3 - Adding a Region to a Country
|
5.
|
You must input the Region Code. |
Note: you also have the option to specify the Sort Order, Status, and Display Name(s).
Editing a country
|
1.
|
From Countries and Regions click on the country you wish to modify and you'll be brought to its page. |
|
2.
|
Make the require changes in the fields provided. |
Editing the regions of a country
|
1.
|
From Countries and Regions click on the country where the region you wish to modify is found and you'll be brought to its page. |
|
2.
|
Select the Regions section found under the Country Settings. |
|
3.
|
Once in this section, edit the regions as you require. |
References